Sparkling Grout, Happy Home: Your Ultimate Cleaning Guide

Grout Cleaning Basics
Grout is porous and tends to collect dirt, grime, and spills, making it look discolored and dingy over time. Regular cleaning not only improves the look of your tile but also prevents the buildup of mold and mildew. Before you begin, identify the type of tile you have (ceramic, porcelain, natural stone) as different tiles require different cleaning solutions. Always test your cleaning solution on a small, inconspicuous area first to ensure compatibility with your tile and grout.
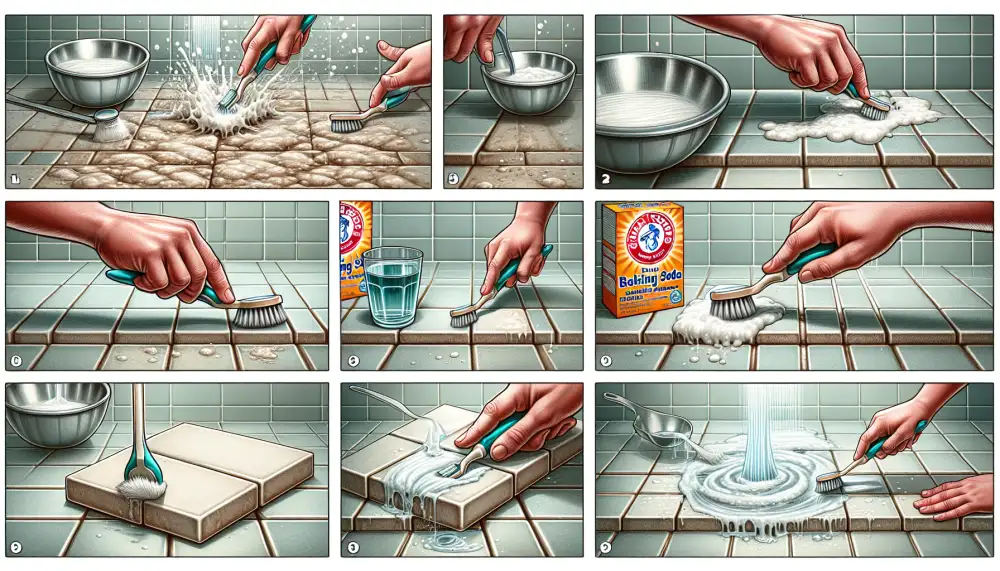
For everyday cleaning, a simple solution of warm water and dish soap can work wonders. Dip a soft-bristled brush or an old toothbrush in the solution and scrub the grout lines. For tougher stains, consider using a paste of baking soda and water. Apply the paste to the grout lines and let it sit for a few minutes before scrubbing. Alternatively, a mixture of equal parts vinegar and water can also effectively tackle grout stains. However, avoid using vinegar on natural stone tiles as it can be acidic and cause damage.
For a deeper clean, consider using a commercial grout cleaner. Follow the manufacturer's instructions carefully. If you have a steam cleaner, it can be a powerful tool for cleaning grout. The steam loosens dirt and grime, making it easier to wipe away. After cleaning, rinse the area thoroughly with clean water to remove any residue. To prevent future staining, consider applying a grout sealer. Sealing helps to fill in the pores of the grout, making it less susceptible to absorbing dirt and stains.
Gather Your Supplies
Before you begin your grout-cleaning mission, gather everything you'll need. This will make the process smoother and prevent unnecessary interruptions. Here's a list to get you started:
- Rubber gloves
- Safety goggles
- Cleaning solution (choose one: store-bought grout cleaner, baking soda paste, vinegar solution, or oxygen bleach)
- Spray bottle
- Scrub brush (nylon-bristled brush or an old toothbrush for tight spaces)
- Bucket
- Warm water
- Mop
- Old towels or rags
- Optional: Grout sealer
Having all your supplies ready will make your grout-cleaning project much more manageable.
Assess the Grout
Before you grab your cleaning supplies, take a moment to assess the state of your grout. This step is crucial for choosing the right cleaning method and products. Start by identifying the type of tile and grout you have. Porcelain and ceramic tiles are more durable, while natural stone tiles like marble or travertine are porous and require gentler cleaning solutions. Similarly, epoxy grout is stain-resistant and can handle stronger cleaners compared to cement-based grout.
Next, determine the severity of the grime. Is it a light dusting of dirt, stubborn stains, or mildew buildup? For light cleaning, a simple solution of warm water and a soft-bristled brush might suffice. However, deeply ingrained dirt or mildew might require a specialized grout cleaner or a DIY paste made from baking soda and vinegar. Remember, always test any cleaning solution on a small, inconspicuous area first to ensure it doesn't damage your grout or tiles.
Pre-Clean the Surface
Before you start scrubbing away at your grout lines, it's important to give them a little prep work. This will help loosen up the dirt and grime, making your cleaning solution more effective. Start by removing any loose debris from the grout lines. A vacuum with a crevice attachment or a stiff brush will do the trick. Once the loose stuff is gone, it's time for a pre-clean. You can use a simple solution of warm water and dish soap or a dedicated grout cleaner. Apply the solution to the grout lines and let it sit for a few minutes to soften the grime. This pre-cleaning step will make your grout cleaning much easier and more effective.
| Method | Effectiveness | Cost | Time Required |
|---|---|---|---|
| Baking Soda & Vinegar | Medium | Low | 30-60 minutes |
| Commercial Grout Cleaner | High | Medium | 15-30 minutes |
| Oxygen Bleach Solution | High | Medium | 30-60 minutes |
| Professional Cleaning | Very High | High | Varies |
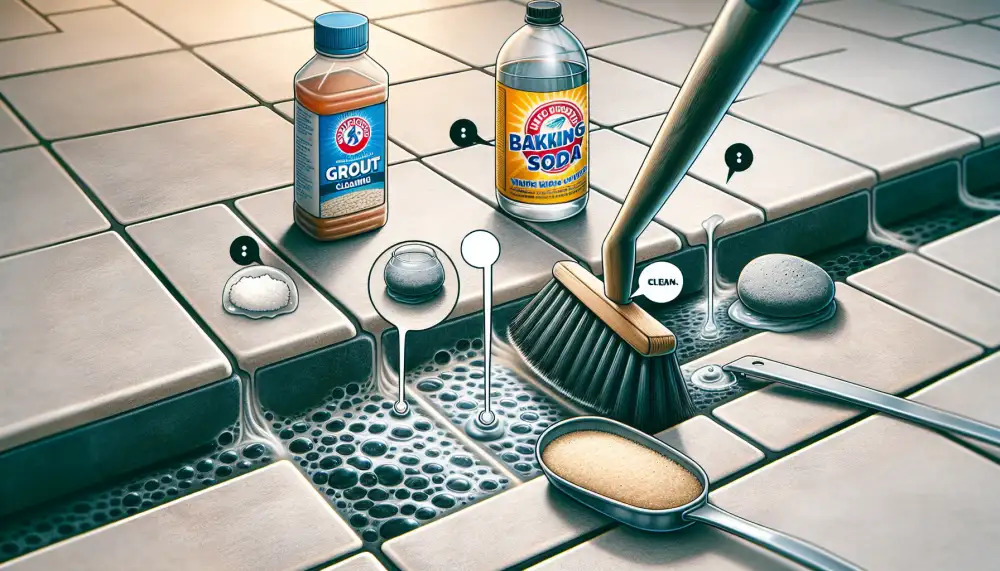
Choose Your Cleaner
When it comes to cleaning grout, you have options. The best cleaner for your grout depends on the type of tile and the severity of the grime. For everyday cleaning, a simple solution of warm water and dish soap can work wonders. Mix a few drops of dish soap into a bucket of warm water and apply it to the grout lines with a sponge or cloth. For tougher stains, you might need something a little stronger. A paste made from baking soda and water can be effective at removing stubborn dirt and grime. Apply the paste to the grout lines and let it sit for a few minutes before scrubbing with a brush. If you are dealing with mold or mildew, you will need a cleaner that contains bleach. Be sure to wear gloves and eye protection when using bleach-based cleaners, and always work in a well-ventilated area. Oxygen bleach is a gentler alternative to chlorine bleach and can be effective at removing mold and mildew stains. Mix oxygen bleach with water according to the package directions and apply it to the grout lines. Let it sit for the recommended amount of time before scrubbing and rinsing. Commercial grout cleaners are also available and can be a good option if you are short on time or don't want to make your own cleaning solutions. Be sure to choose a cleaner that is compatible with your type of tile and grout.
When it comes to cleaning grout, you have options. The best cleaner for your grout depends on the type of tile and the severity of the grime. For everyday cleaning, a simple solution of warm water and dish soap can work wonders. Mix a few drops of dish soap into a bucket of warm water and apply it to the grout lines with a sponge or cloth. For tougher stains, you might need something a little stronger. A paste made from baking soda and water can be effective at removing stubborn dirt and grime. Apply the paste to the grout lines and let it sit for a few minutes before scrubbing with a brush. If you are dealing with mold or mildew, you will need a cleaner that contains bleach. Be sure to wear gloves and eye protection when using bleach-based cleaners, and always work in a well-ventilated area. Oxygen bleach is a gentler alternative to chlorine bleach and can be effective at removing mold and mildew stains. Mix oxygen bleach with water according to the package directions and apply it to the grout lines. Let it sit for the recommended amount of time before scrubbing and rinsing. Commercial grout cleaners are also available and can be a good option if you are short on time or don't want to make your own cleaning solutions. Be sure to choose a cleaner that is compatible with your type of tile and grout.
Apply the Cleaner
Before you begin, protect your hands with rubber gloves. Depending on the cleaner you choose, you may also want to wear eye protection and ensure good ventilation. If you're using a commercial grout cleaner, follow the instructions on the product label carefully. These instructions will guide you on the appropriate application method, recommended dwell time, and safety precautions.
For a homemade solution, you can create a paste using baking soda and water. Apply this paste to the grout lines and let it sit for a few minutes to soften the dirt. Remember, the longer you let the cleaner dwell (within the recommended time frame), the easier it will be to remove the grime. However, avoid letting the cleaner dry on the grout, as this can lead to discoloration.
Let it Sit and Work
O
Scrub the Grout Lines
Grout lines are like the Achilles' heel of a beautiful tile surface. They trap dirt, grime, and mildew, making your once-pristine floors and countertops look dull and dingy. But don't worry, scrubbing those grout lines back to their former glory is totally doable, even if you're not a cleaning pro. Start by giving your grout a good sweep or vacuum to remove loose debris. Then, mix up a cleaning solution using warm water and a gentle pH-neutral cleaner. For tougher stains, you can use a specialized grout cleaner or try a paste made from baking soda and water. Apply the cleaner to the grout lines and let it sit for a few minutes to loosen up the grime. Now it's time to scrub! A stiff-bristled brush is your best bet here. Dip it in your cleaning solution and scrub the grout lines in a back-and-forth motion. You might need to put in some elbow grease for stubborn stains. Once you're satisfied with your scrubbing session, rinse the area thoroughly with clean water. A wet/dry vacuum can be super helpful for sucking up excess water and grime. Finally, let your grout lines dry completely. If you're feeling extra diligent, you can apply a grout sealer to help prevent future staining. Remember, regular cleaning is key to keeping your grout lines looking their best.

Rinse Thoroughly
After letting your cleaning solution work its magic, it’s time to rinse away the grime. This step is crucial for preventing hazy residue and ensuring your grout dries clean. You can use a few different methods for rinsing, depending on your preference and the size of the area you’ve cleaned:
For smaller areas, a spray bottle filled with plain water can be your best friend. Spray the grouted area thoroughly, ensuring you flush away all the cleaning solution. Wipe away the dirty water with a clean cloth or sponge. Repeat this process until the water runs clear, indicating all the cleaner is gone.
For larger areas, consider using a wet vacuum or a mop with a bucket of clean water. A wet vacuum can efficiently suck up the dirty cleaning solution, while a mop allows you to cover more ground quickly. Whichever method you choose, ensure you change the water frequently to avoid re-depositing dirt and grime onto your freshly cleaned grout.
Tackle Stubborn Stains
Grout is porous, so it easily absorbs dirt, grime, and spills, leading to unsightly stains. Start by identifying the type of stain, as different methods work best for various stains. For everyday dirt and grime, a simple solution of warm water and a mild dish soap can work wonders. Apply the solution with a scrub brush or toothbrush, working it into the grout lines. Rinse thoroughly with clean water. For tougher stains like grease or food spills, create a paste using baking soda and water. Apply the paste to the stained grout and let it sit for a few hours or overnight. Then, scrub the paste with a brush and rinse with water. For more stubborn stains like mold and mildew, a mixture of equal parts white vinegar and water can be effective. Spray the solution onto the grout lines and let it sit for several minutes before scrubbing and rinsing. If natural solutions don't yield desired results, consider using a commercial grout cleaner. Always test any cleaner on a small, inconspicuous area first to ensure it doesn't damage your grout or tiles. Remember to wear gloves and ensure good ventilation when using any cleaning agents.

Consider a Grout Sealer
Once your grout is sparkling clean and completely dry, you might want to consider applying a grout sealer. Think of it as a raincoat for your grout! A grout sealer is a protective barrier that helps repel dirt, grime, and stains, making your future cleaning endeavors much easier. It comes in both spray and applicator bottle forms, so you can choose the option that best suits your needs and comfort level.
Before applying, always make sure your grout is completely dry, as trapped moisture can hinder the sealer's effectiveness. Apply the sealer carefully, following the manufacturer's instructions. Usually, you'll need to let the sealer sit for a specific amount of time before wiping away any excess. Once the sealer is dry, your grout will have an extra layer of protection against future stains and dirt, keeping it cleaner for longer. Remember, prevention is key, and a little grout sealer can go a long way in maintaining the beauty and cleanliness of your tiled surfaces.
Enjoy Your Clean Grout
Once your grout is sparkling clean, you want to keep it that way! Regular maintenance is far easier than deep cleaning sessions. Here are a few tips to enjoy your clean grout for longer:
Wipe up spills immediately: Don't let spills sit and stain. The quicker you address them, the less likely they are to discolor your grout.
Implement a regular cleaning schedule: Depending on the traffic in your tiled areas, aim for a weekly or bi-weekly cleaning routine. A simple scrub with a brush and warm, soapy water can work wonders.
Consider a grout sealer: Sealing your grout after cleaning creates a protective barrier against future stains and makes cleaning even easier.
Ventilation is key: Ensure proper ventilation in areas like bathrooms to prevent mold and mildew growth, which can discolor grout. Run the exhaust fan or open a window after showering.
Remember, a little effort goes a long way. By incorporating these simple habits into your routine, you can keep your grout looking its best and enjoy a cleaner, fresher home.
Published: 01. 07. 2024
Category: Food